Showing posts with label halloween. Show all posts

Wednesday, October 30, 2013

Candy-Coated Pretzels in Sprinkled Boxes

This really isn't about the candy-coated pretzels as much as it is about the cute containers I put them in.  I love these french fry boxes!  

I got a few of these white french fry containers with the idea that I could put treats in them for gifts.  They come blank though and I couldn't figure out what I wanted to do with them until I saw this post on jacksandkate.com with directions on adorable sprinkled party hats.  Using Halloween sprinkles, I semi-emulated her party hats and I love the way they turned out!

Even if you don't have blank french fry boxes, you could use any white box to turn it into an awesome gift box.  In fact, I may be doing the same thing at Christmas and using a plain white gift box to hold tasty goodies for the neighbors.  It might be easier too with a bigger "canvas."

Sprinkled French Fry Boxes


Here's how I decorated the french fry boxes.  I just can't wait to share because I love them so much!

Materials
French fry containers
hot glue gun/glue sticks
Candy sprinkle balls (the smaller the better)
Font pattern
Pen or pencil for tracing

First, select fonts and size them to fit on the front of the french fry boxes. (I used these words and edited the format so they would be an outline. You don't really need to do that but I did it so I would know exactly what to trace.)  Then, print them out on plain white printer paper.

After centering the words where you want them, trace the letters.  I used a red pen so I'd know where I traced.  Press hard so the indentation will show through on the box.  Once done tracing, lift the paper and there should be an outline of the words on the box (in the second picture below) 


Outline each letter you want covered in sprinkles with hot glue.  Cover it in sprinkles just like glitter, shake off the excess, and move on to the next letter.  Complete one letter at a time to ensure the glue stays hot.


You may have to use a toothpick to emphasize the holes or ensure there is space between your letters.

I wanted some of my words in black.  If you want like this look, just trace it with a permanent black marker and fill it.  It makes a great contrast to the sprinkles.

Fill with whatever goodies you want.  They would make great party favors and sprinkles can be changed for any occasion.


Candy-Coated Pretzels

These are a super quick and easy project to give you more time to decorate the sprinkled boxes.  Not much to these but they taste great and are so festive.

Ingredients
Vanilla-flavored or chocolate-flavored almond bark (or white/milk chocolate)
large pretzel sticks
sprinkles, various

Melt your vanilla-flavored almond bark (or melted chocolate).  

Place it in a container conducive to dipping the long pretzel sticks.  It can be in a shallow, flat container as long as it allows your pretzel to be covered completely.

Dip your pretzel sticks.  


Shake off excess and set on waxed or parchment paper to cool.  Before it cools you can put sprinkles on them or wait until they cool to add more decorative icing and sprinkles.


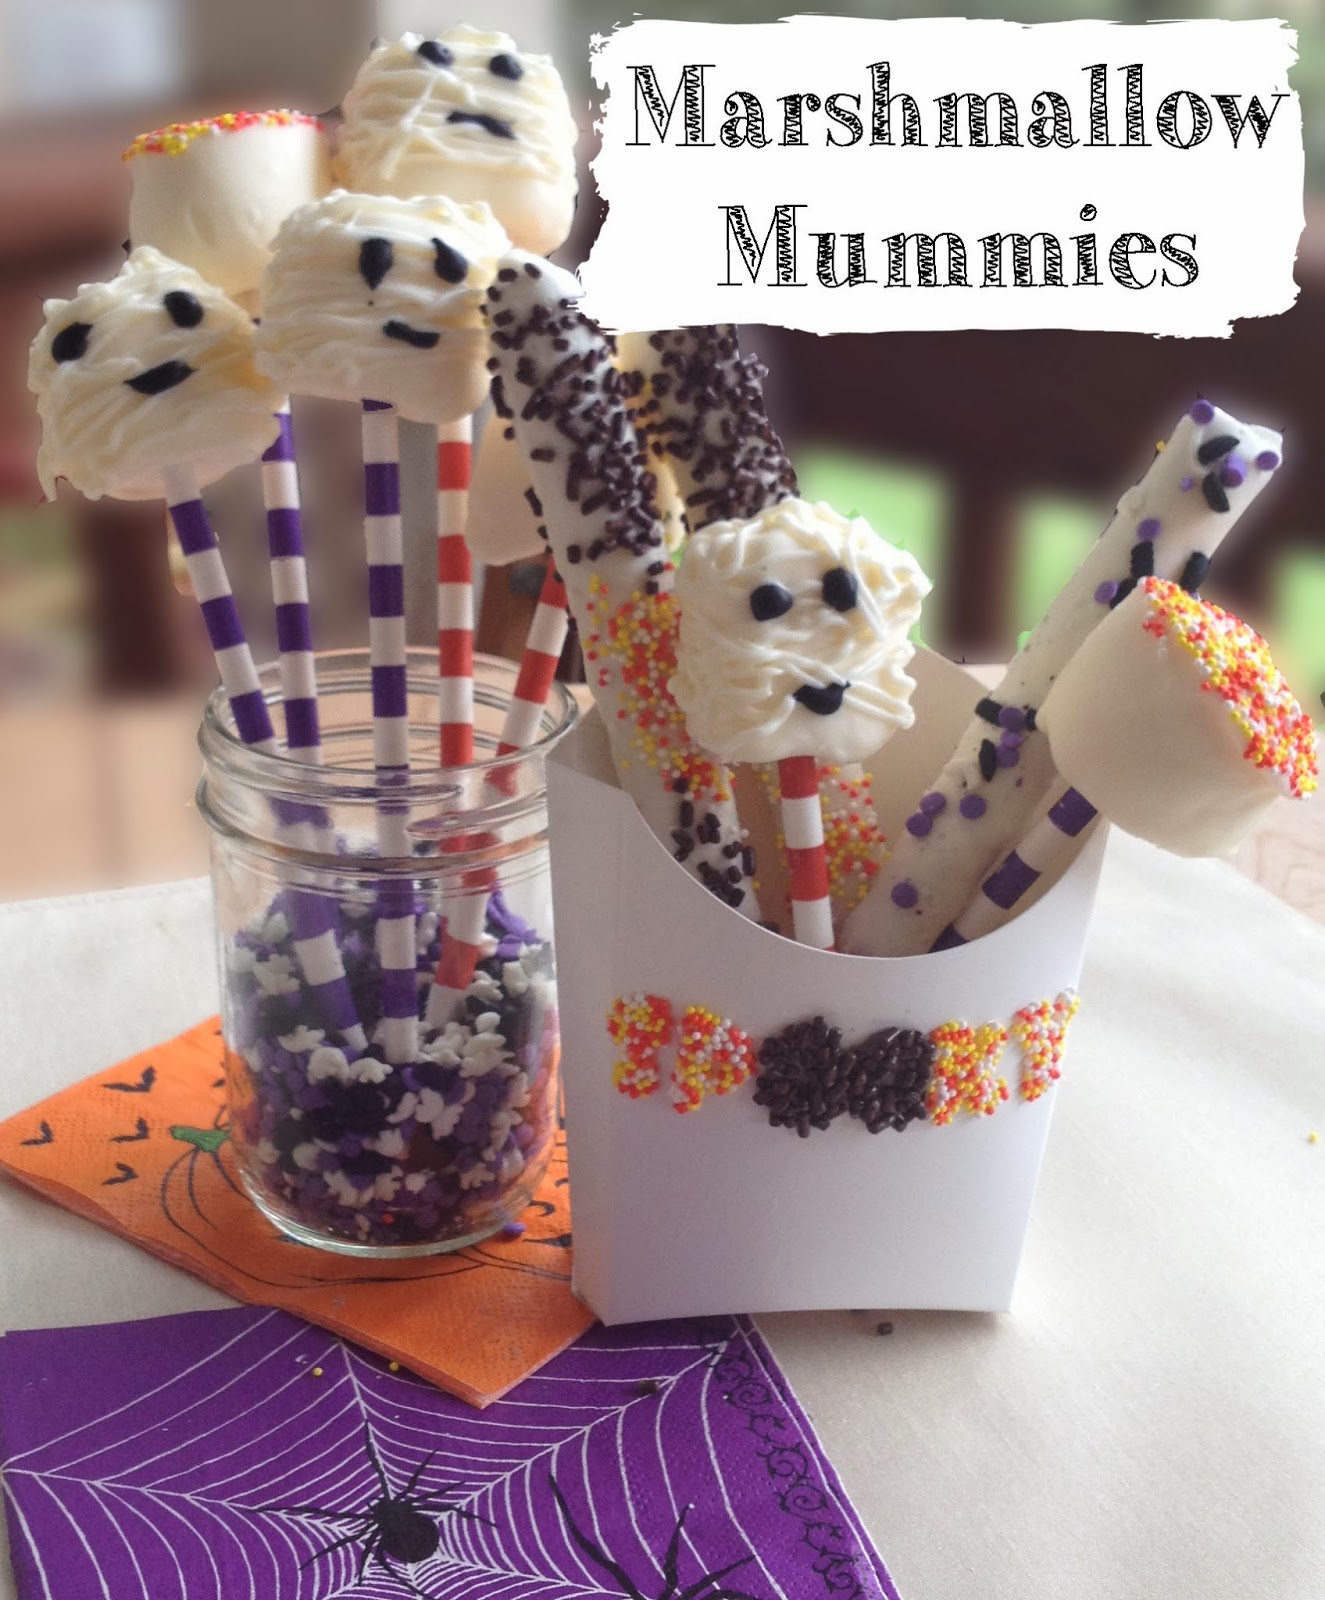


Mummy Marshmallows

These marshmallow mummies are super easy and quick. They make a good gift for my procrastinating self to make the night before Halloween. 

Marshmallow Mummies

Ingredients
24 large marshmallows
24 decorative straws or  wooden dowels
Vanilla-flavored Almond Bark (or white chocolate)
black icing

To make these, use some cute decorative straws or wooden dowels to hold the marshmallows.  Prepare them all and find a place where you can store them to cool.  I just use a Styrofoam block with holes poked in it.  

Melt your vanilla flavored almond bark (or white chocolate - I'm not a fan) and dip the marshmallow into the almond bark.  Shake off the excess and set aside to cool.


Once cool, you can put melted almond bark in a piping bag and drizzle it all around the marshmallow for the mummy wraps.  

Top the mummy off with some eyes and maybe a mouth and it's done.  I just used pre-made black icing from Betty Crocker but I wish I had some of these cute candy eyes from Wilton.

Put your mummies in the awesome Sprinkled French Fry Boxes and you have a great party sweet or fun take home party favor. 


Thursday, October 10, 2013

Witch's Hats

When I first got into Pinterest a couple of years ago it was around Halloween.  I was overwhelmed with all the awesome ideas I saw but didn't get a chance to do them.  

I remember seeing these witch's hats all over. There is a huge assortment of them out there if you search "chocolate witch hats."  These are my own interpretation of them.  They're SO easy but they really make a cute, festive, and tasty decoration or you can use them on the top of a cupcake, too.

Witch’s Hats

Ingredients
Unwrapped Hershey’s Chocolate Kisses (24)
Chocolate Striped Shortbread Cookies (24)
Orange frosting, in a bag with a very small tip

1.  Turn the chocolate striped shortbread cookies upside down with the solid chocolate side showing.
2.  Put a thin layer of frosting around the bottom edges of the Hershey’s Kiss.

3.  Place the Hershey’s Kiss frosting side down onto the middle of the cookie.


4.  Using the orange frosting, place a thin stripe around the base of the Hershey’s Kiss to make a hat band.  Draw a bow on the front of the hat with the orange frosting as well.


Super easy to make and SO cute!  Use these by themselves or top off onto Be-Witched Cupcakes!

Monday, October 7, 2013

Hairy Spider Cupcake

My son recently schooled me on spiders.  He made sure to let me know they're not an insect and that they have eight legs.  I mean, I  knew they had eight legs however I might have looked it up to make sure before I made these spider cupcakes.

Even when I was making them, he pointed out a spider cupcake that didn't have eight legs.  Very clearly, with the "duh" tone in his voice, he told me that spiders have to have eight legs.  I didn't want to point out to him that spiders also have two sections to their body and these spiders only have one.  I'm sure he'll point that out to me next year when we make these.  You know, when he's older and wiser...and in first grade.

I’m not really sure why spiders are associated with Halloween except for the creepy factor they have.  I guess the cobwebs of spiders past can make an old, haunted house even creepier.  I will say, though - the only spiders I like are chocolate variety you see here.

This chocolate cupcake is topped with chocolate buttercream frosting and lots and lots of sprinkles.  I like the sprinkles on this one because it makes the spider look hairy.  I’m tempted to call this a tarantula cupcake. 

Tarantula Cupcake


Ingredients
24 cupcakes
Chocolate buttercream frosting
48 mini M&M chocolatecandies
Black licorice laces or Twizzlers cut into thin strips – cut into pieces about 1- 1 ½ inches long

Directions

1.  Begin by frosting your cupcake with a generous amount of frosting.  I use a piping bag with no tip to make the icing pretty thick on top.

2.  Dip the frosted cupcake in the sprinkles to cover the entire frosting with sprinkles.

3.  Place 4 pieces of licorice on each side of the cupcake for legs.  You need to put it far enough into the icing to keep them in place.  If your icing isn’t thick enough, you may need to push the legs into the actual cake.

If you can't find licorice strings (like me) you can use licorice and cut the twists in half with kitchen shears.  Then cut the strips into 1 - 1 1/2 inch long pieces.  To the right is a picture of me cutting the licorice twists.


I wish I had purchased some licorice string online, though.  I think it would have looked better.  Next time, I'll get Kenny's black licorice laces like these:


4.  Put your mini M&Ms in the spider for eyes.


Easy, peasy, you have a creepy crawly eight-legged arachnid.


Wednesday, October 2, 2013

Pumpkin Iced Vanilla Cupcakes


Fall is a perfect season for cupcakes.  Actually, I think every season is a good season for cupcakes but Fall is a great season for decorating them.  With Halloween, the ideas are endless and there are always opportunities to make cupcakes to share. This pumpkin iced cupcake for Fall doesn't require much extra effort to make an extremely cute seasonal treat.


Pumpkin Iced Vanilla Cupcakes
 
Begin with your cupcake.  You can fix your cupcake from scratch with this recipe or make it from a box. As long as you have a foundation to work with, it doesn't matter where it comes from.

You'll also need some frosting. I suppose you can use a canned frosting but it's nice to have homemade because you can make it the consistency and flavor that you want.  Here's my favorite buttercream recipe.

Vanilla Buttercream Frosting
Printable version
4 ½ cups powdered sugar
½ cup stick butter, softened
1 ½ tsp vanilla
2-3 Tbsp milk
Food coloring gel, orange

In a medium bowl, mix the sugar and butter then stir in the vanilla and add milk until it's smooth and at the consistency you are looking for.   

Add food coloring gel until completely mixed and the color is right.  

For the pumpkin cupcakes, you will need two different colors.  Set aside about ½ cup of white frosting before creating the orange.  With the icing you set aside, you can add green food coloring gel to have a small bag of green frosting.


Pumpkin Decorated Cupcakes
Ingredients
vanilla buttercream - colored orange
vanilla buttercream - colored green
orange sugar sprinkles
Kit Kat minis

1.  After you create your orange frosting (I had to use "golden yellow" and "red" to make mine since I didn't have orange gel), you can begin creating your pumpkin cupcakes.  Use a piping bag without a tip to get a smooth frosted top for your cupcake.
2.  Pour the orange sugar sprinkles in a bowl wide enough to hold the cupcake.  With a smooth frosted top, turn the cupcake upside down and roll the iced top in the sprinkles.  Roll the sides first then roll the top of the cupcake to smooth it out.


3.  Once your cupcakes are frosted and sugared, place a mini Kit Kat in the middle of the cake, standing up like a stem.


4.  To add more color to your pumpkin, you can also add a leaf or two to the edge of the Kit Kat.  There are special tips for making leaves but I just used a Ziplock bag.  

Add your green frosting to the bag and cut the corner at a bit of an angle, with the seam of the bag facing up.  This seam, along with the angle, will help make the "leaf" come out with a line on it. 

If this seems too complicated, you can also just cut a small tip off the bag to make a squiggly vine around the Kit Kat stem.

5.  Now that you have leaves or vines, you've got yourself a pumpkin cupcake!  Looks adorable and is delicious too!